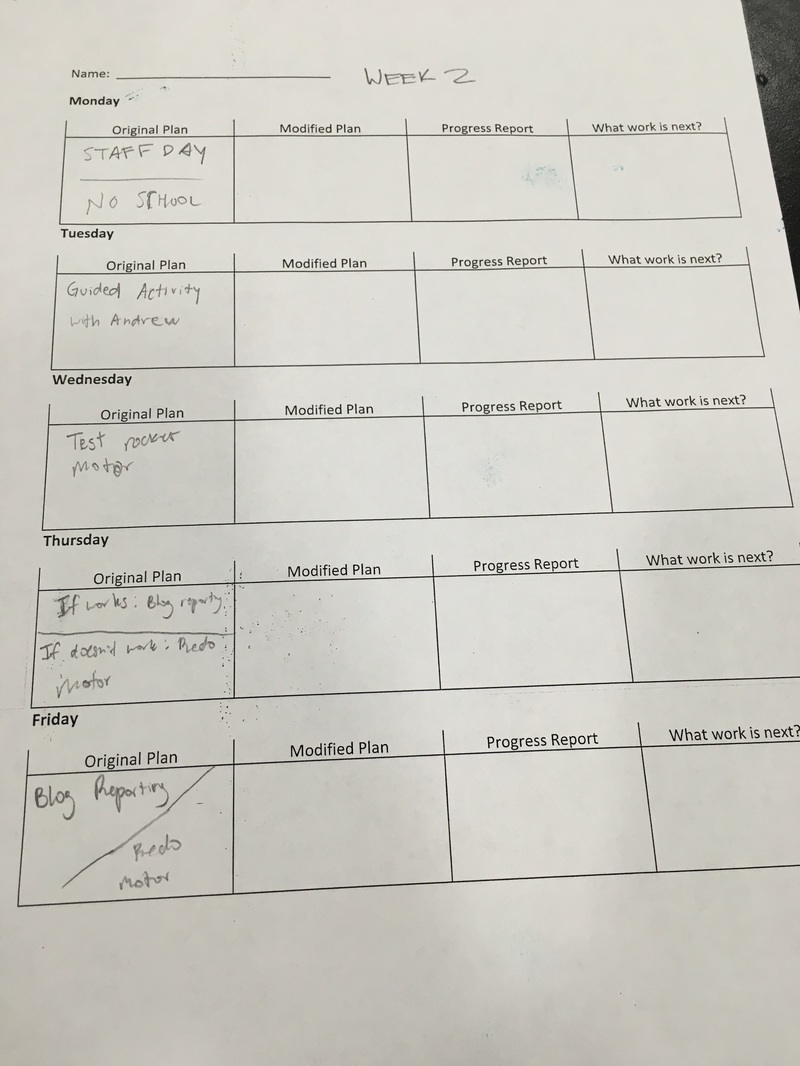
This is my two week plan for Section 3. These are some of the things I'd like to get done these 2 weeks. I like to plan my stuff because usually when I don't plan, I will be very confused.
 |  |
|
This is my two week plan for Section 3. These are some of the things I'd like to get done these 2 weeks. I like to plan my stuff because usually when I don't plan, I will be very confused.
0 Comments
Research for rocket
Jesus & Bijan Cored Burner rocket motor: A cored burner motor is a motor with a 1 inch clay nozzle. The clay nozzle is usually made of normal clay and or the clay HTH uses for rockets is cat litter, that is smashed down to where it is a powder, and pressurized in the motor body. Also a cored burner has a drill going through the clay to the black fuel or fuel that you are using to get more distance out of it. End Burner rocket motor: A end burner has a clay nozzle also used from cat litter. This is different than a cored burner because this type of motor has a hole from the drill just going through the clay nozzle and from there it burns and makes it’s way up to the fuel. The drill hole is a lot smaller, it uses a drill of 3/16’s. Engine Fuel: Potassium nitrate is a chemical compound of KNO^3 and is a natural solid of Nitrogen. Its is a ionic salt of potassium ions K⁺ and nitrate ions NO₃−. Sugar: Caster Sugar nothing really different than sugar at your house, and this is really just smashed to make it a powder sugar, and that’s caster sugar. 1.
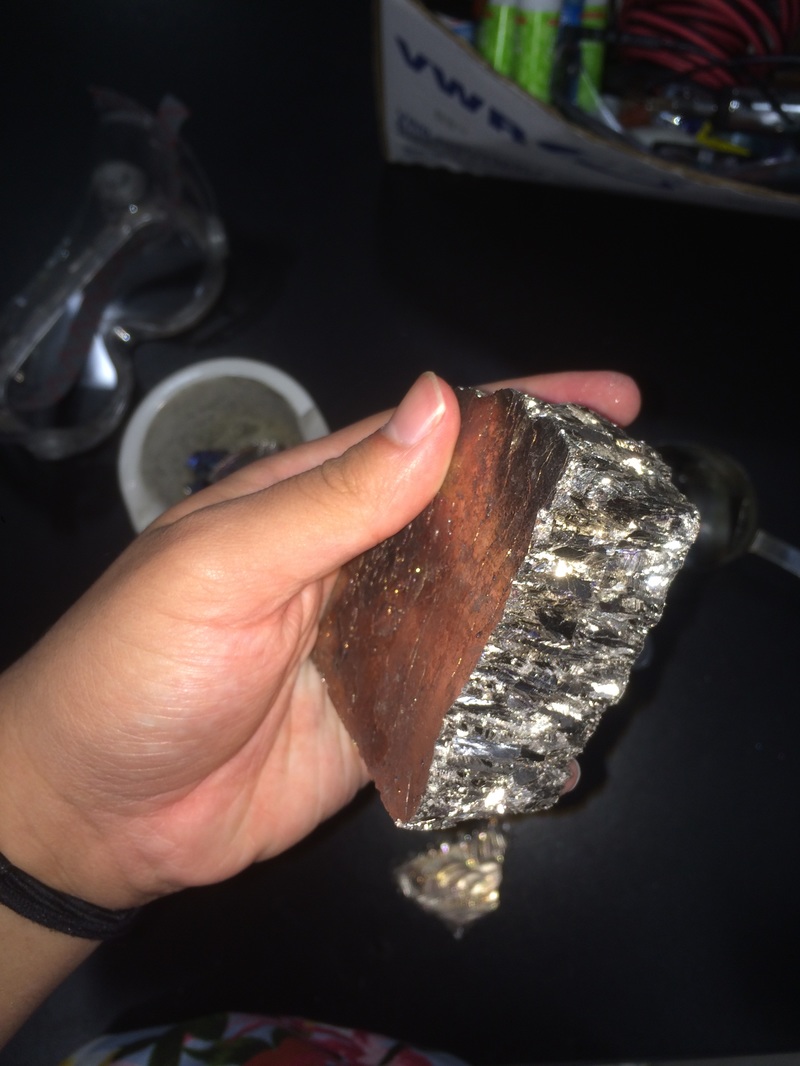
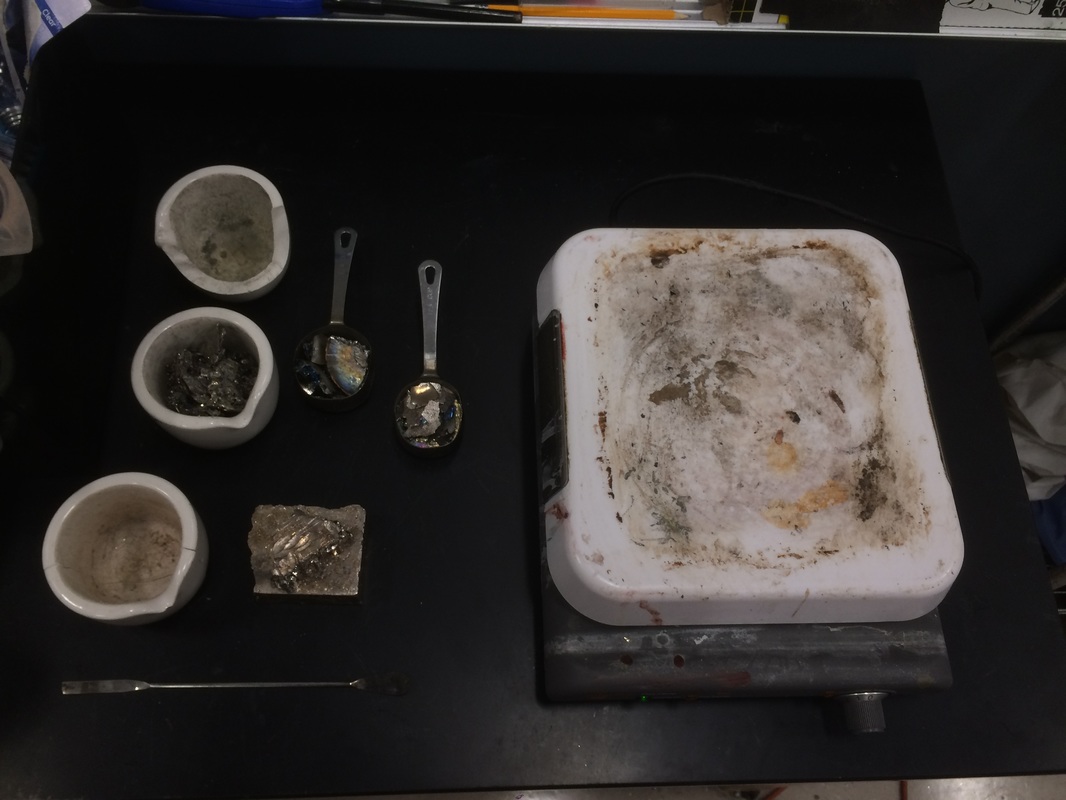
a.) I did a time lapse of the beach because I was there at the time and the sunset looked very nice, this was the day that Andrew first introduced this assignment, so I kind of wanted to start with something like this. b.) I used my iPhone, because that is all I had at the time. I used the Time-Lapse feature on the camera. c.) In the video, you can see that the waves are coming in, the sun is setting, and there are people walking through the sand and hanging out at the beach on a nice afternoon. d.) I found it interesting that after recording for a whole 5 minutes, the picture only changed a little. The waves look very cool in motion though. 2. a.) Some questions that came up were: Does weather have anything to do with the waves? What can I do to better prepare myself for next time? Why does the sun take forever to set? b.) The science behind what I observed is simple. It is just about the sun setting, we orbit the sun, so the sun is going to go down and come up in the morning. Its something most people already know. c.) If I were to continue, I would want to capture the sun rise, and the sun set with professional equipment so it would look better. My partner and I recently melted down bismuth using a hot plate. Once melted down, it has characteristics of meted tin, almost like silver water. It moves easily in a metal measuring cup, and hardens after some cool down time. Our goal was to dump out excess liquid bismuth around half way into the cool down time, right when the crystallization is at it's peek.
Looking Back:
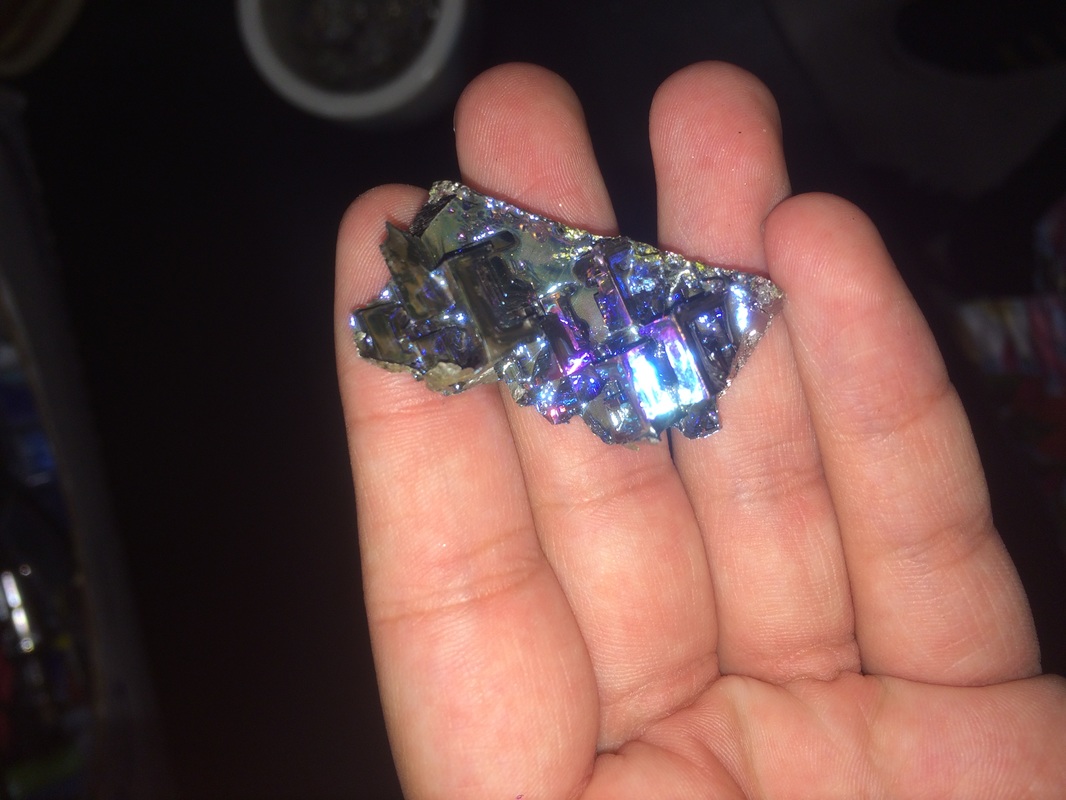
Our first few times attempting to make bismuth crystals were all busts. The crystals were not creating on their own and therefore just branching off of the sides. To make a crystal grow in the center of the container, we dropped a very small crystal of bismuth to trigger the crystallization process. this worked very well. The bottom picture shown is one of our many successful crystals of bismuth. Looking Beyond: Bismuth is easy to understand. It submits to heat with little resistance, as it's a fairly brittle substance when thin. When it cools from a liquid state, it goes through a crystallization stage, and our goal was to dump out the rest of the bismuth once it was around halfway hardened. The science behind crystallization boggles my mind to this day, considering how intricate and precise things can be, naturally. The science behind our mini crystal triggering a bigger crystal stage is fairly simple. The temperature of the mini crystal is much colder compared to that of the surface bismuth, and when it cools is when the crystallization happens, that is why it triggers a crystallization process right at that point. Looking Inward: I believe we got our desired results our final time around. We got beautiful crystals, brittle they might be. I am quite pleased with this experiment especially considering how un-orthidox the process is. I think we might have gotten bigger,better crystals if we used a metal pot to cook up a big chunk of bismuth. Looking Outward: I think my partner (Gabriel Malcolm) and I worked well together, especially because of our communication; and that is a very key quality to have in a partnership when working with dangerous materials and equipment as we were. Looking Forward: If I were to do this again, I would try to take the bismuth and make it into jewelry. That was what we were going to do before but we ended up not doing it. So, for another project I would make it into jewelry. 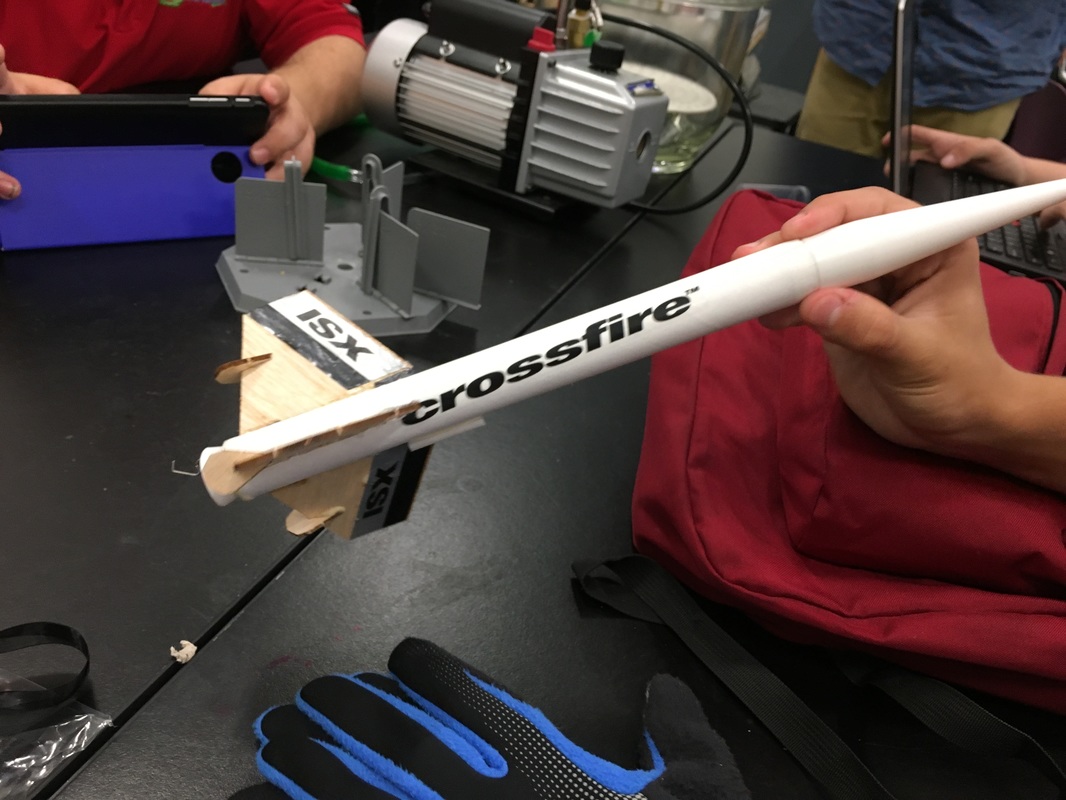 Build Notes:
To build our model rocket we had to first assemble the engine mount. To build the engine mount, we had to hold different pieces together for the gorilla glue to dry. Once fully hardened over night, we were able to move on to the next step of assembling the fins. This was more difficult than the motor mount because the fins had much less surface area for the glue to grab. After some trial and error we were able to mount all three fins on very solid. Final step was to make the parachute device. We did this by tying the parachute to the nose piece, and then a thick rubber band from the nose piece to the body of the rocket. Now that our rocket was built, we were able to pack our parachute and rubber band into the rocket itself. Trent then went to Fiesta island with some other students launching rockets and launched our model rocket. Performance Notes: I think our rocket performed very well. We got our desired results and learned lots of useful information on rocketry and the chemistry behind it. When the motor is launched, it spits off power to the rocket, and since the rocket is guided by the launch pad, the rocket has more of a tendency to go straight up. And as shown in the video, ours did just that. Once it started to descend, the nose piece comes off and lets the parachute open up instantly, safely gliding it down back to earth. The flame test lab was very fun and educational. What we did was get a lot of different elements and burn it in a bunsen burner, because when you burn certain elements, they give off certain colors. They give off the colors because energy levels have a discrete amount of energy associated with it, the energy given off is a specific wavelength, or combination of wavelengths depending on the number and types of jumps the electrons made. The wavelengths correspond to different types of energy. So basically when you burn them, you can tell what elements are inside because of the color of the flame.
Lithium (Li) = Red Copper (Cu) = Green Sodium (Na) = Yellow orange Boron (B) = Light Green Strontium (Sr) = Dark orange Potassium (K) = Violet Magnesium (Mg) = White Looking Back: We got a whole bunch of elements (as listed above) and we burned them with a bunsen burner to see if we can find out which elements create different colored flames, Looking Beyond After a brief talk on the basics of whats happening on a molecular level, I understood that our substances are heated up to a very specific level as a result of a very specific heat being applied. When that energy is released, or the substance has it's heat source taken away, it falls back down the levels and on the way down releases light or color. Looking Inward: I think we could have gotten better results. Some particles from different substances found their way onto the bunson burner, making the chemical reaction for the other substances tainted. We were still able to see the other colors that each substance produced, even though another substance was still in play. I think we could have avoided this by having multiple metal rods to put the different substances in so that there was no contamination from the previous substances. Looking Forward: I would consider doing this project with my partner and trying other elements just to experiment with all of them to see if we can mix and match any other things to find very cool results. Today, we had a guided activity from our teacher. We learned all the measurements to everything and how they all came to be. Every measurement originated from meters because that was the most accurate.
Length: meter (m) Volume : liter (L) = 1dm^3 Mass: Gram (g) = 1 cm^3 of H2O = 1mL or cc (cubic centimeters) Time: Seconds (s) Amount of Stuff: Mole (mol) Temperature: Kelvin (k) = Degrees Celsius + 273.15 = Kelvin Ratios and Comparisons: Velocity: Distance/Time = d/t = m/s Molarity: mol/L - for a solution Density: mass/volume = g/mL Looking Inward: We did a guided experiment on how to measure stuff and the different measurements of different objects and elements such as liquids, gases, and solids. What did you learn? I learned that I am a better learner when the lab is guided, because I focus better and I get my work done without getting off task. I like guided labs better because I feel safe, and also I feel that I am getting help along the way. Do you like your work to be guided or self directed? I like both, but I prefer guided because personally I feel like I understand the information better when it is being taught to me. I feel like I learn it a lot faster and easier. How might this information be used somewhere else? All these measurements can be used in a lot of other places, because everything in life can be measured. Everything involves measurements. I started to build a model rocket in class. I am in a group with my classmates, Gabriel and Trent. We got a kit to start and so far we are constructing it pretty well. We had some difficulties at first because we didn't know how to start our project but then our teacher gave us a rocket to build. We have been building it for the past few days and we are going to launch it soon. We were thinking about making a rocket out of scratch for after we finish building this one.
|
AuthorHi, I am Bijan. Archives
December 2015
Categories |
 RSS Feed
